This post may contain affiliate links. I may receive a small commission at no extra cost to you that goes towards supporting Fluffy Stitches. All opinions are my own. Full Privacy & Disclosure Policies HERE.
Crochet You Are Here Sign
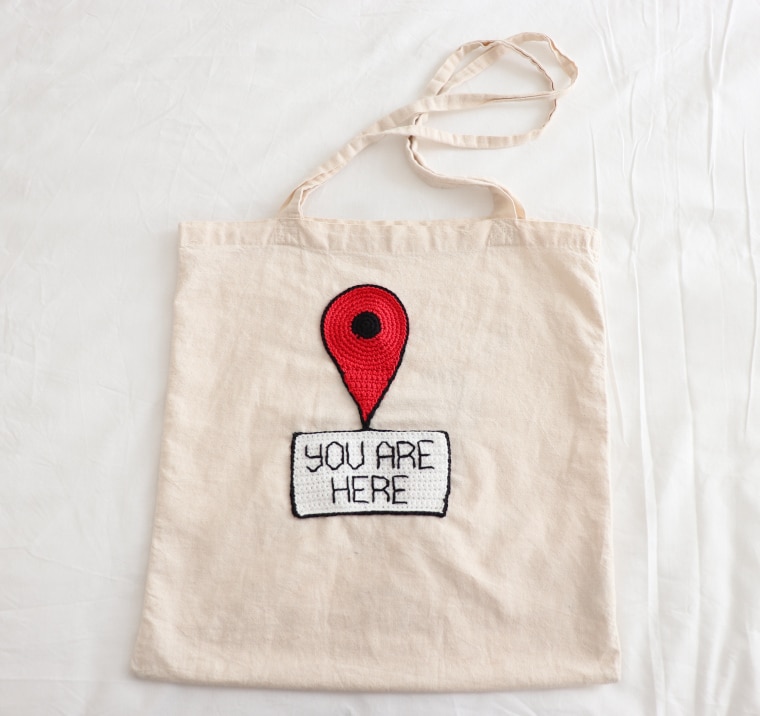
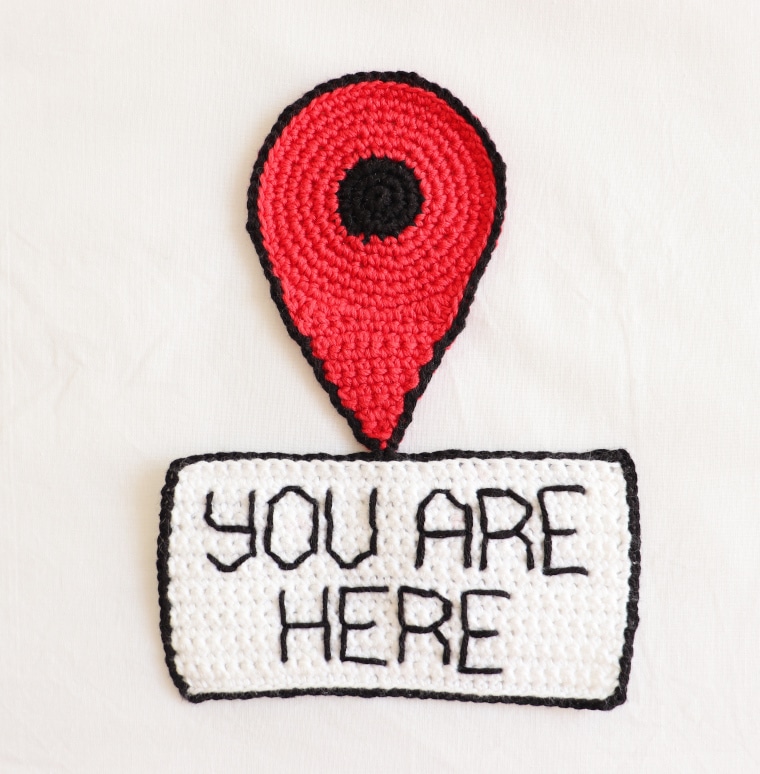
The Crochet You Are Here Sign is the project that will keep you in place! A quick project, perfect for travelers or just to keep things fun. Add it to any accessory or clothing piece and you’ll be sure to never lose yourself or your things again!
Inspiration
Living in far away places and moving around the globe has become part of my life. I’d never thought it would be me, but here I am and I am happy and grateful! 🙂 However, there are moments when things seem so hectic that I really need something to ground me. And nothing like a bit of crochet to do just that!
After working on the Tropical Bookmark Set I was really looking forward to doing another small project. Something related to this “nomad” way of life that had also a calming and humorous effect. A “YOU ARE HERE” sign to let me know that, it doesn’t matter my location… I just have to be present! 😉
The Project
With the idea formed, I just needed to figure out how to do a pin! I’ll admit it wasn’t at my first try and I ended up using quite a few different stitches, but don’t feel discouraged by it. The pattern is still mostly single crochets.
As for the yarn, I used scraps from the bookmark set. Both the Drops and Katia Yarns feel very good to work with for these smaller projects.
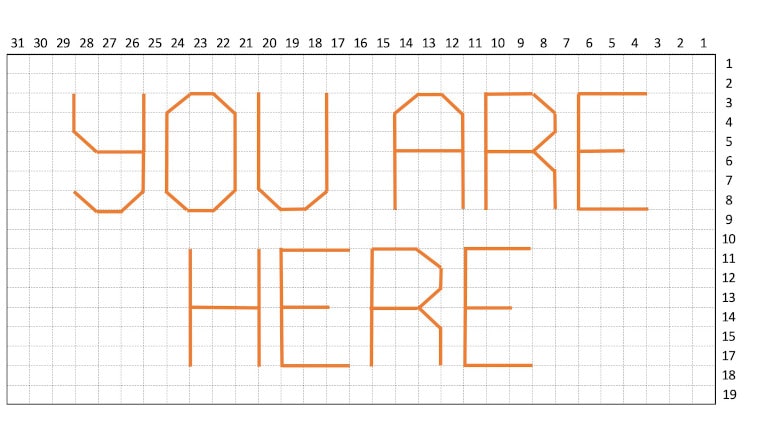
Finally, I just needed to decide where to place it. My yarn tote was looking very plain, so it was just the perfect fit! The good thing about it is that you can choose to accessorize whatever you want! Whether it’s your tote, your backpack, your jacket, … the possibilities are endless! I hope you have fun making this pattern and remember, that no matter where you are, YOU ARE HERE! 😉
Pattern
- You can buy the ad-free, printable PDF pattern HERE!
- PIN this pattern for later HERE!
- Add this pattern to your Ravelry queue HERE!
Description
The Crochet You Are Here Sign is the project that will keep you in place! A quick project, perfect for travelers or just to keep things fun. Add it to any accessory or clothing piece and you’ll be sure to never lose yourself or your things again!
Skill Level
- Easy
Have in Hand
- 1 skein Drops Safran (175 yd/160 m) in:
- Off White Uni Color 18 for Color A
- Black Uni Color 16 for Color B
- 1 skein Katia
Tencel-Cotton (131 yd/120 m) in Color 4 for Color C - US size D (3.0 mm) crochet hook
- tapestry needle, scissors
Gauge
- 10 sts x 12 rows of sc = 4”/10 cm
Finished Measures
- 7.25’’/18.5 cm x 5.25’’/13 cm
Abbreviations (US Terms)
- blo: back loop only
- ch: chain
- dc: double crochet
- hdc: half double crochet
- inc: increase [work 2 single crochet in 1 stitch]
- sc: single crochet
- sk: skip
- sl st: slip stitch
- st(s): stitch(es)
- t: turn
Notes
- The You Are Here Sign is made by making two separate pieces: the white sign and the pin. You’ll join them by adding a border of sl st around both pieces.
- This project is worked in continuous rounds, meaning that you do not sl st when you reach the end of the round. Instead, you just keep working your sts above the ones from the previous round. I recommend using a stitch marker to mark the first st of every round so that you can keep count easily.
- In order to make the inc less noticeable on the final shape of the pin, I suggest making them in different parts of the rounds. Sometimes at the beginning, others at the end and others in the middle. In the pattern below I always start with inc, but it is just as a reference. What matters is that you keep the same number of sts between each inc while in the same round. Check this tutorial on how to make the perfect crochet circle!
- When making the white sign, the ch 1DOES COUNT as a st.
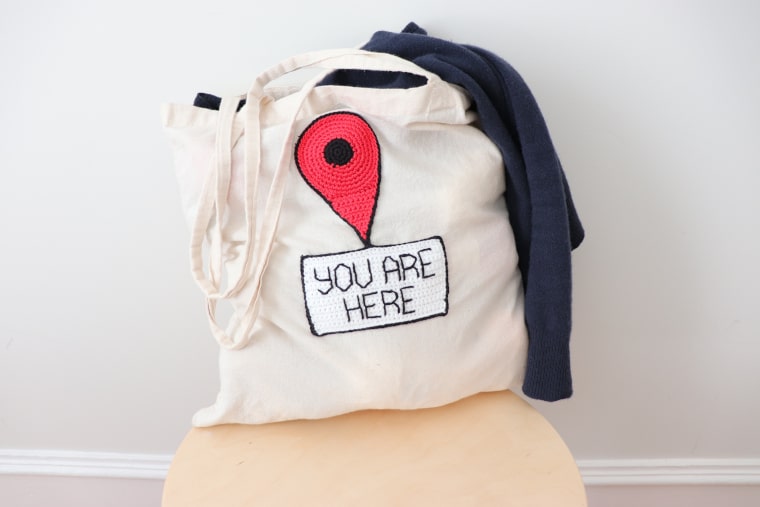
- When making the letters on the white sign, the rows are not exactly aligned. Count your stitches if you’re ever in doubt about where to insert the tapestry needle.
- When making the bottom of the pin, the ch 1 DOES NOT COUNT as
a st .
Crochet You Are Here Sign
White Sign & Letters
Start with Color A.
Ch 31
Row 1: ch 1 (counts as 1 sc), t, sc across to end of row <31>.
Row 2-19: repeat Row 1. Sl st, fasten off and weave in ends.
Using Color B.
With the tapestry needle, make the writing on the sign. Each letter is 6 rows high, with 2 rows between each, and 3 sts wide, with 1 st in between. Fasten off and weave in ends.
Pin
Start with Color B
Make a magic ring.
Round 1: 6 sc into the magic ring <6>
Round 2: Inc in each st across <12>
Round 3: [Inc, sc] 6 times <18>
Change to Color C
Round 4: [Inc, sc, sc] 6 times <24>
Round 5: [Inc, sc, sc, sc] 6 times <30>
Round 6: [Inc, sc, sc, sc, sc] 6 times <36>
Round 7: [Inc, sc, sc, sc, sc, sc] 6 times <42>
Round 8: [Inc, sc, sc, sc, sc, sc, sc] 6 times <48>
Round 9: [Inc, sc, sc, sc, sc, sc, sc, sc] 6 times <54>
Round 10: sc, hdc, 2 dc, hdc, hdc, sc, sc, sc, hdc, hdc, 2 dc, hdc, sc, sl st. Fasten off and weave in end. <16>
Without turning your work, proceed from the 1st dc of the last round (counting from right to left). Pull up a loop and crochet as follows:
Row 1: ch 1 (does not count as a st), sc across to end of round. The last sc will be done above the 2nd dc from the row below <10>.
Row 2: ch 1, t, sk 1 st, sc across to end of row. The last sc will be done over the ch 1 from the row below <9>.
Row 3 – 10: Repeat Row 2. At the end of Row 10, st count is <1>.
Row 11: t, sc, sl st, fasten off and weave in ends.
Assembly
Using Color B.
To finish the project, you will add a black border by sl st on the
Start from the sl st from Round 10 and pull up a loop there. Sl st around the pin, making sure to make a 2 sl st every 8 sts (the 2 sts don’t count) while you’re doing the round part of the pin.
At the bottom of the pin, instead of going all around, start sl st the white sign from the middle of the top row to join the two pieces. Keep sl st until you have completed the edge for both the pin and white sign. Fasten off and weave in ends.

No Comments