This post may contain affiliate links. I may receive a small commission at no extra cost to you that goes towards supporting Fluffy Stitches. All opinions are my own. Full Privacy & Disclosure Policies HERE.
So here you are, ready to learn the Crochet Puff Stitch and work your way to the jasmine stitch! And to make it easier, let me show you how making one is actually part of the work to make the other. 🙂
Anatomy of the stitch
One of the things mentioned in the first post of the series is that the jasmine stitch that I’ll show you is a flower of 6 petals. Each petal is made of crochet puff stitches. These are 5-loop puff stitches. The jasmine stitch is made by doing, not one puff stitch at a time, but three puff stitches at a time in what I call the 3-puff cluster, which we’ll cover in another post.
Looking at the fabric here are the different parts highlighted.
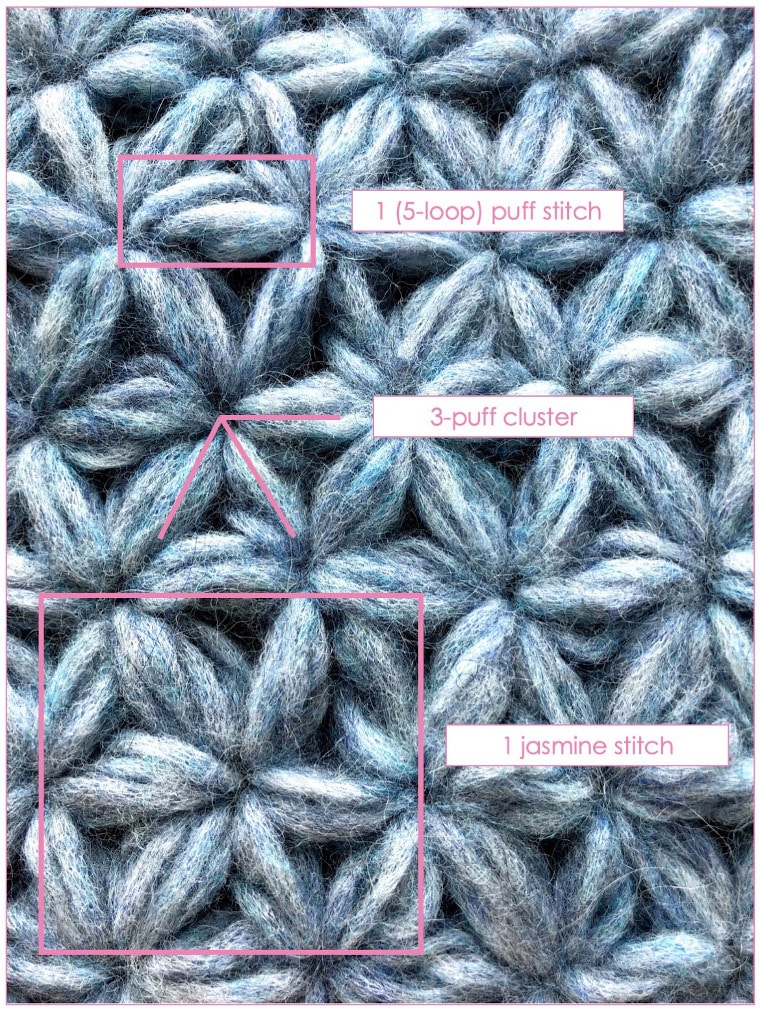
Using the yarn I mentioned before, which is a worsted weight yarn and a US size J (6.0 mm) hook, each jasmine stitch is approximately 2.25’’/5.5 cm in both width and height.
However, this depends on how much or how little you lengthen your loops. I lengthen mine to about 1’’/2.5 cm but that is just the measure that I get with the natural hook movement. You will find your measure as soon as you make your first puff stitches.
(5-loop) Puff Stitch
Again, a small disclaimer about this crochet puff stitch: this is how I make the stitch for this project. It may be different from other tutorials you’ve seen. It’s just how I’ve adapted it and this is how it works for me. 😉
Here is the video tutorial for the (5-loop) Puff Stitch. Please note the video is in Portuguese.
So, my puff stitches are made with 5 loops. You can make more or fewer loops, according to the yarn you’re using. For this yarn, 5 loops make the flowers look fluffy and it makes for a warm piece. If I wanted to cut back on yarn, 3 loops would still look good, because this yarn has some fuzziness that fills the gaps. If that’s not the case with your yarn, I would recommend doing 5 or even 7 loops.
For this and the following tutorials I will use the following abbreviations (US terms):
- ch: chain
- st(s): stitch(es)
- yo: yarn over
Starting your puff stitch
To start any project, you need to make your first puff stitch. After going through this post, you will have a 5-loop puff stitch will look something like this.
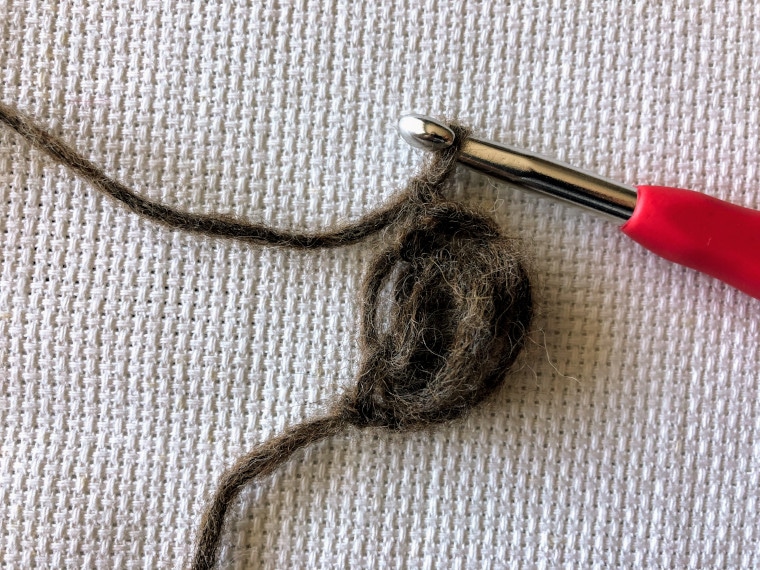
As with any crochet project, make a slip knot and proceed the following way.
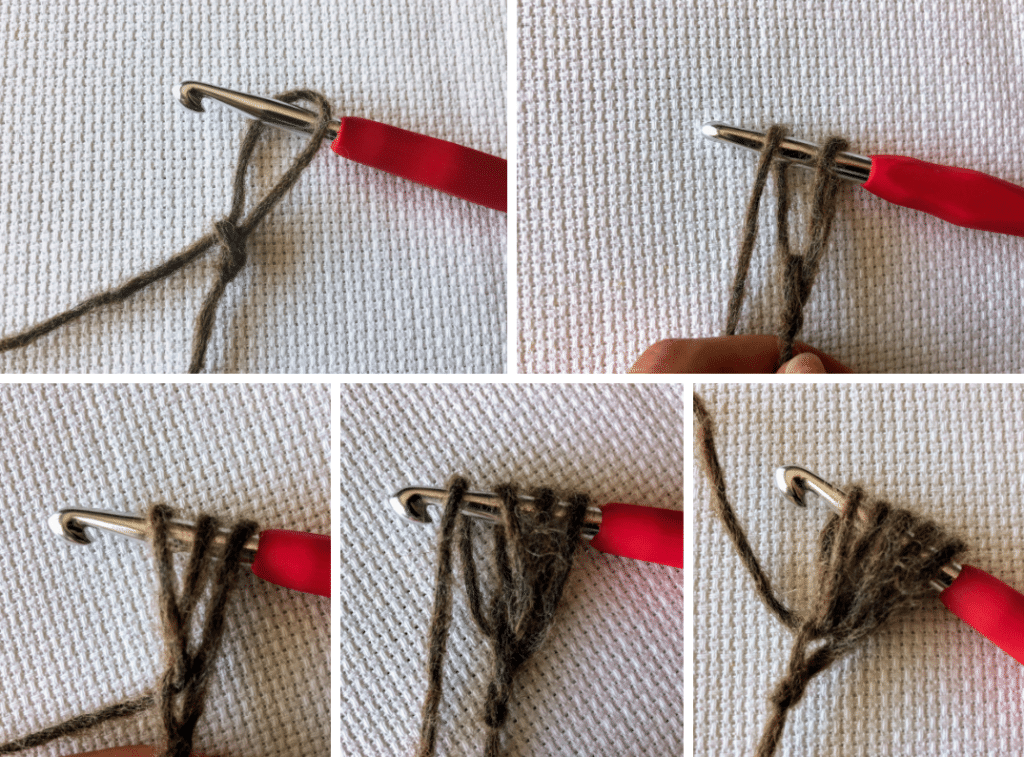
Step 1 – All loops on hook
Ch 1 and lengthen your loop (1 loop on hook). Pinching the ch st, yo (2 loops on hook). Try to keep the same lengths for your loops. Insert hook into ch, pull up a loop and lengthen it (3 loops on hook). Yo (4 loops on hook). Insert hook into ch, pull up a loop and lengthen it (5 loops on hook).
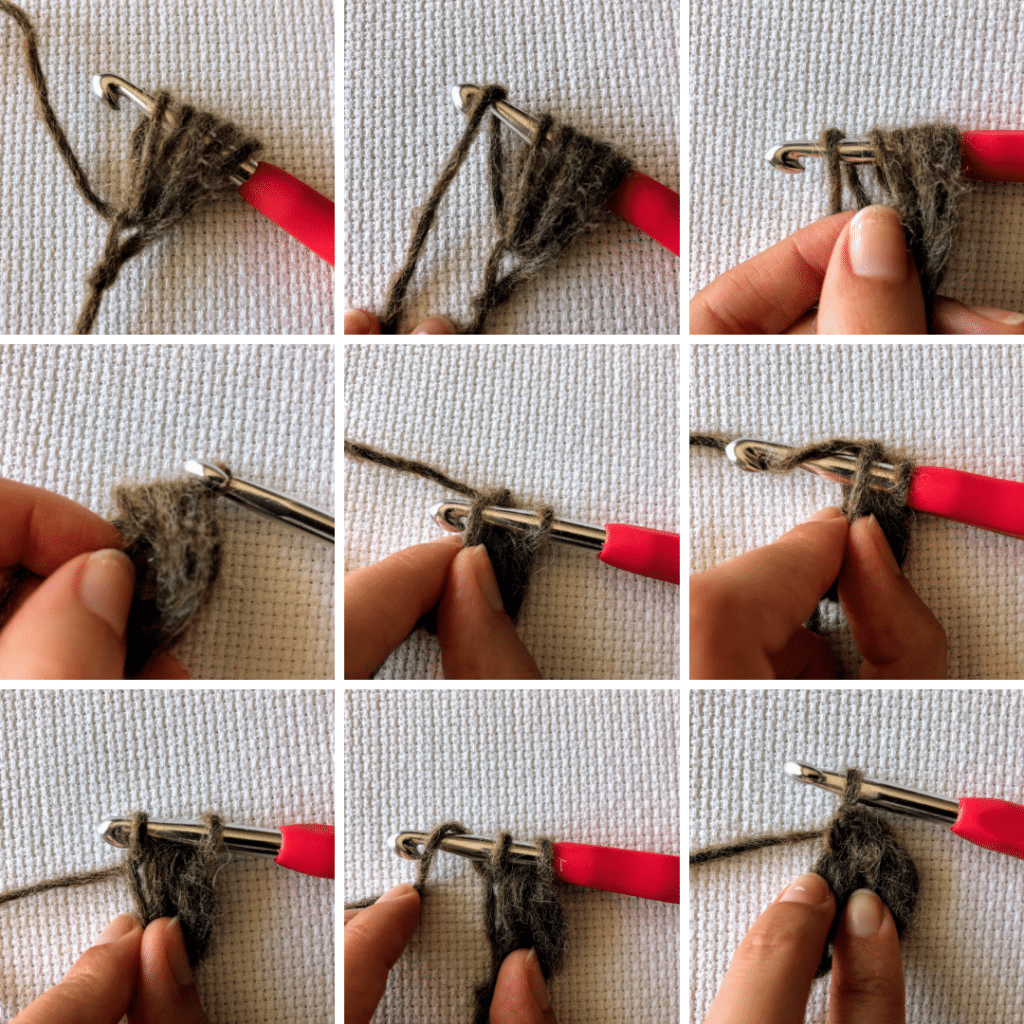
Step 2 – Closing the puff stitch
Yo once again and pinch the yarn that forms the back loop of your yo. Without letting go of the yarn, pull through all loops (1 loop on hook). Insert your hook under the yarn you are pinching and pull up a loop (2 loops on hook). Yo and pull through both loops to close the puff st. Ch 1 to tighten it.
Your first puff stitch!!
Congratulations! 🙂 You have now completed a 5-loop puff stitch!
But one puff stitch alone doesn’t make much, so let’s keep going! Let’s move on to the Foundation Puff Stitches!

No Comments