This post may contain affiliate links. I may receive a small commission at no extra cost to you that goes towards supporting Fluffy Stitches. All opinions are my own. Full Privacy & Disclosure Policies HERE.
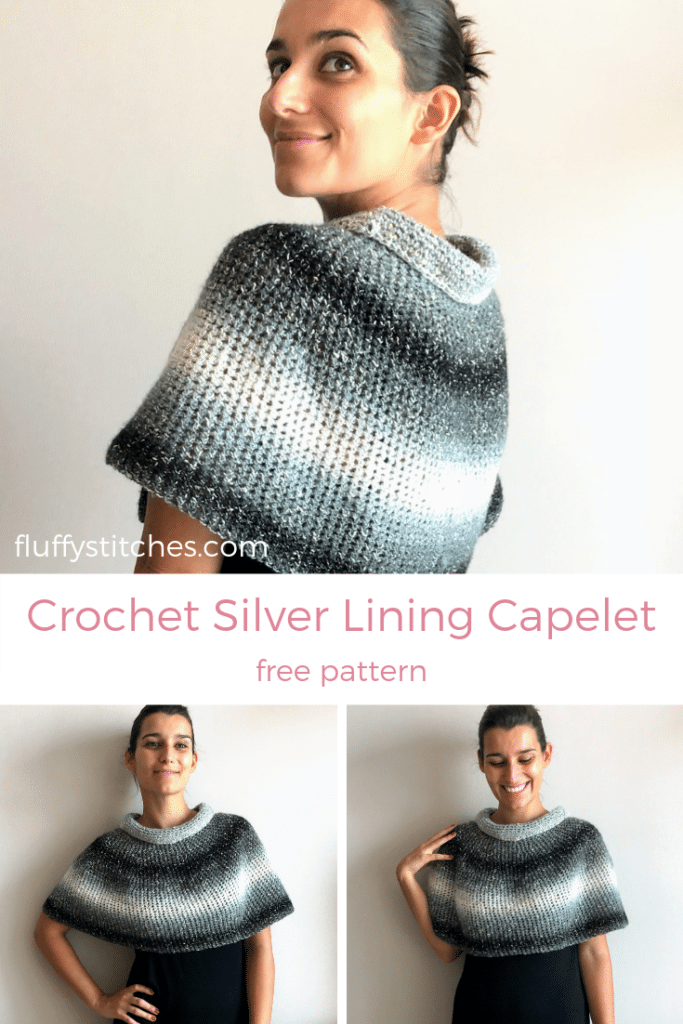
Crochet Silver Lining Capelet
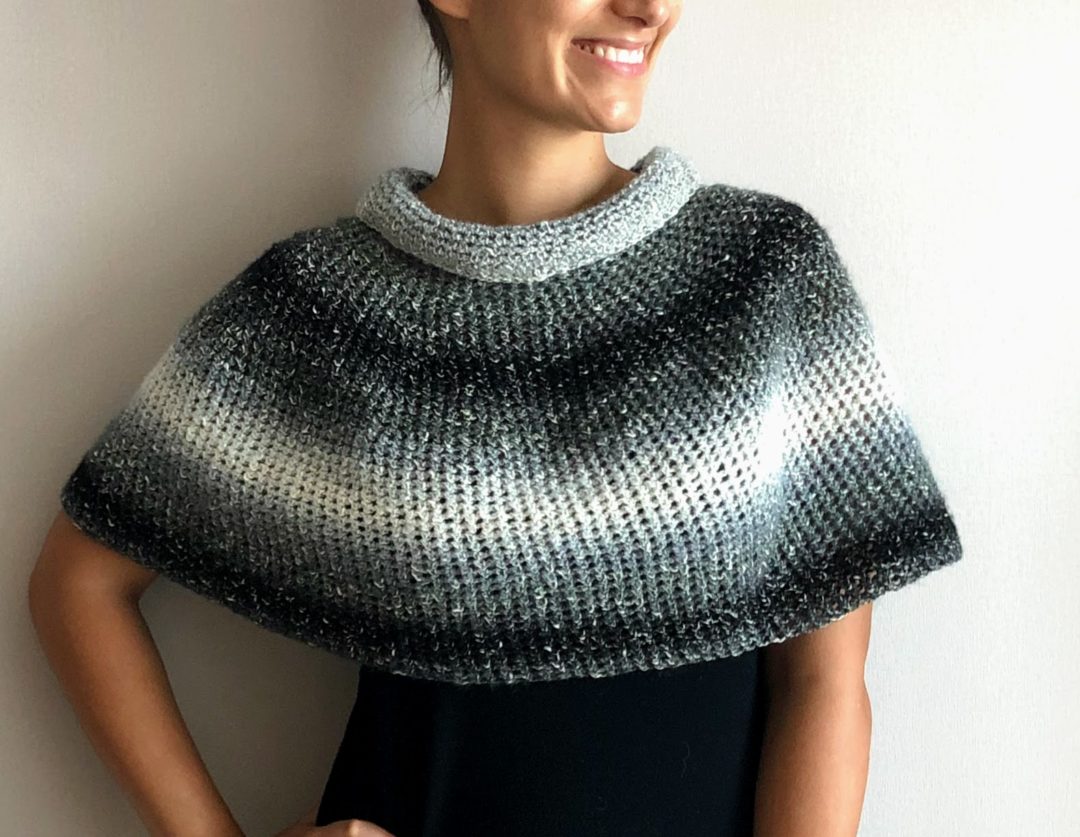
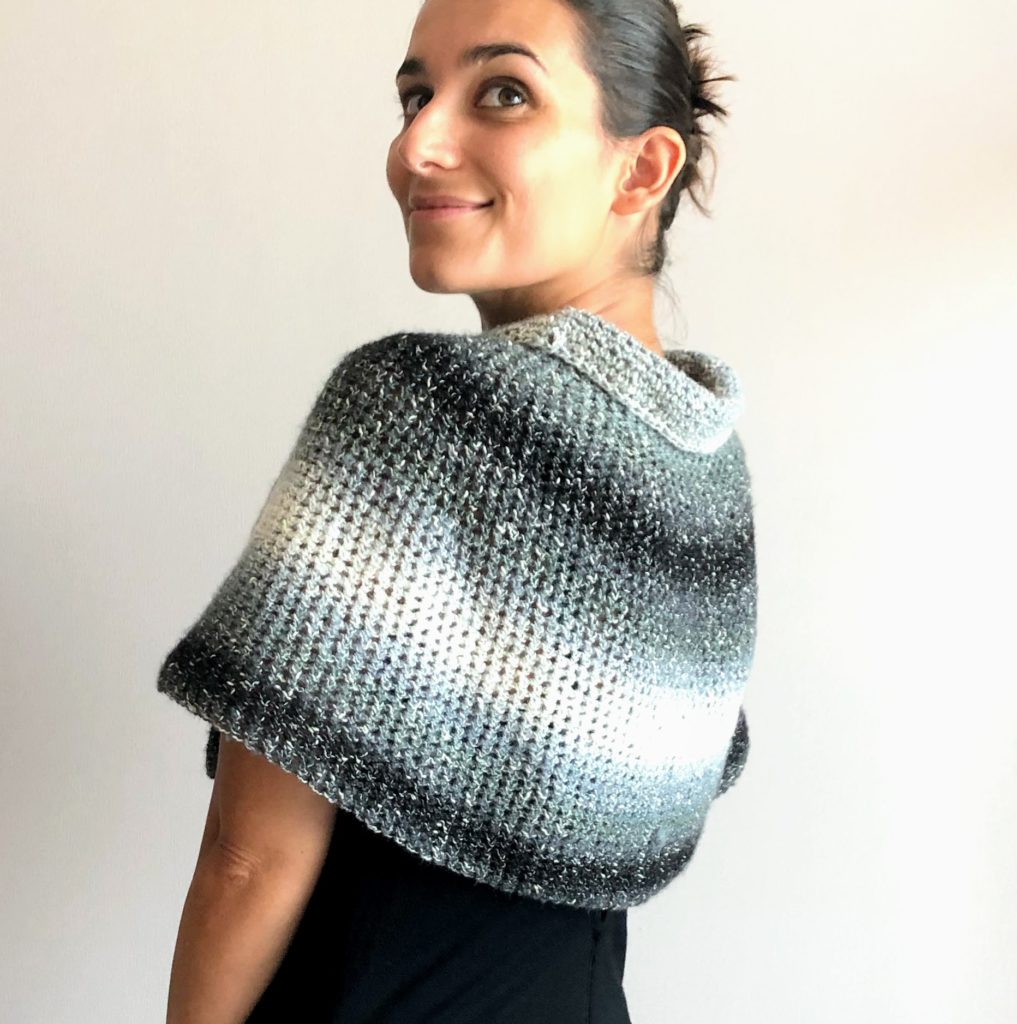
Hello there! Want a show-stopper layering piece that will keep you warm and never fall off your shoulders? Then let me present to you the Crochet Silver Lining Capelet!
Remember about my favorite shawl? I shared it in the post about my favorite 5 Crochet and Knit Shawls. It’s amazing, I love it and it goes everywhere with me! However, there are some situations where it is not the most practical piece. For example, when I’m doing the dishes. Or when I’m brushing my teeth… I don’t know why but it seems the shawl chooses such precise moments to undo itself and fall in the dirty water or in the sink full of toothpaste.
Situations like these made me realize I wanted something to go over my shoulders but that wouldn’t fall in my soup (yes, that happened too). And this was how the Crochet Silver Lining Capelet came to life.
Inspiration
After getting my shawl dirty for the n-th time because it opened and fell on something, I decided “no more”! I was going to make something practical, to wear as a warming layer and that wouldn’t cause me more embarrassments. Not too big that could be considered a poncho because I wanted something “lighter”. That and it couldn’t use too much yarn, because… small stash issues. Then it dawned on me that what I was thinking of was a capelet.
Usually, when I read the word caplet it doesn’t excite me very much. So this was the perfect opportunity to change that and make a capelet that I would wear! A sort of timeless statement piece… Or maybe my mind was running wild. Can practical and elegant go hand in hand?
The Project
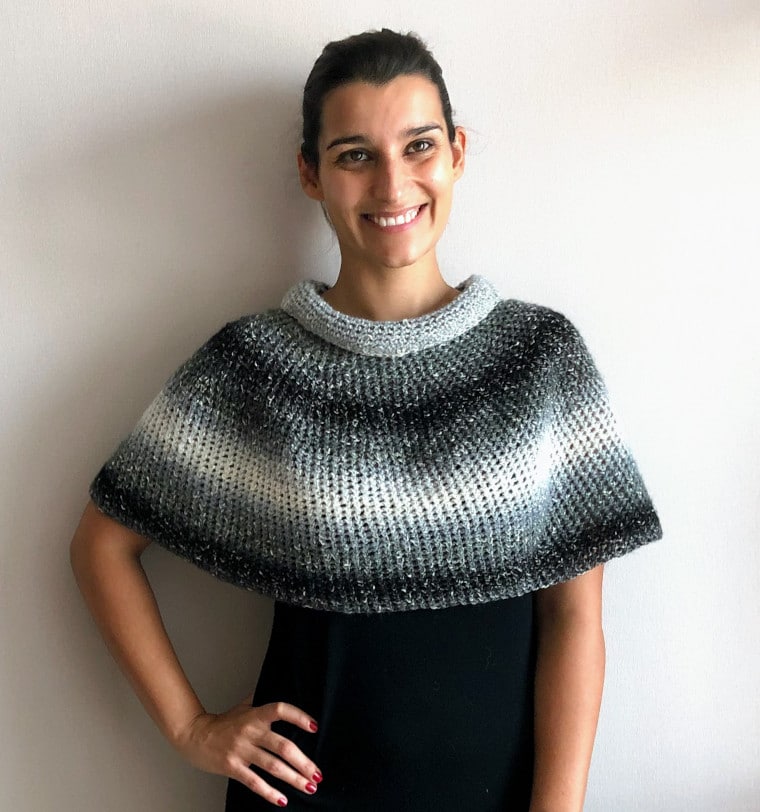
My stash may be small, but I had kept a skein of Lion Brand’s Shawl in a Ball for a special occasion. Looking at its gray tones, I knew the time to use it had come!
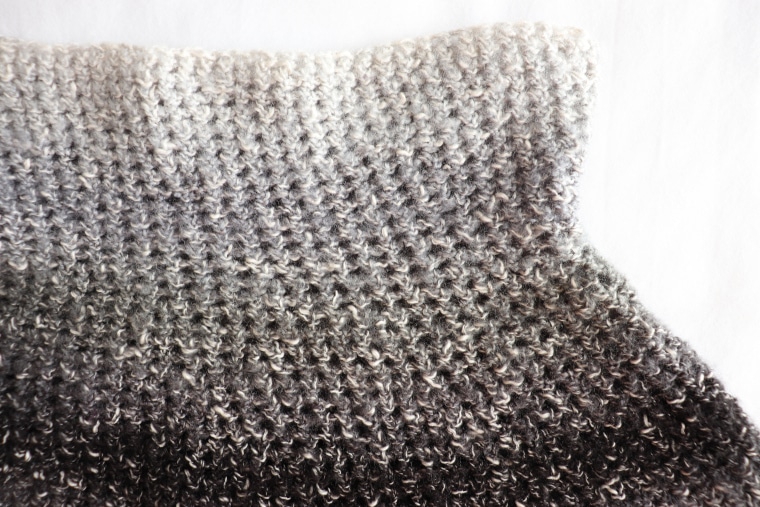
I wanted an easy pattern, and since the yarn already has so much texture and color details, a simple mesh look would do the trick. To achieve that look, I decided on the single crochet stitch but using a larger hook than the one recommended. This way the stitches are looser and the whole piece “breathes”.
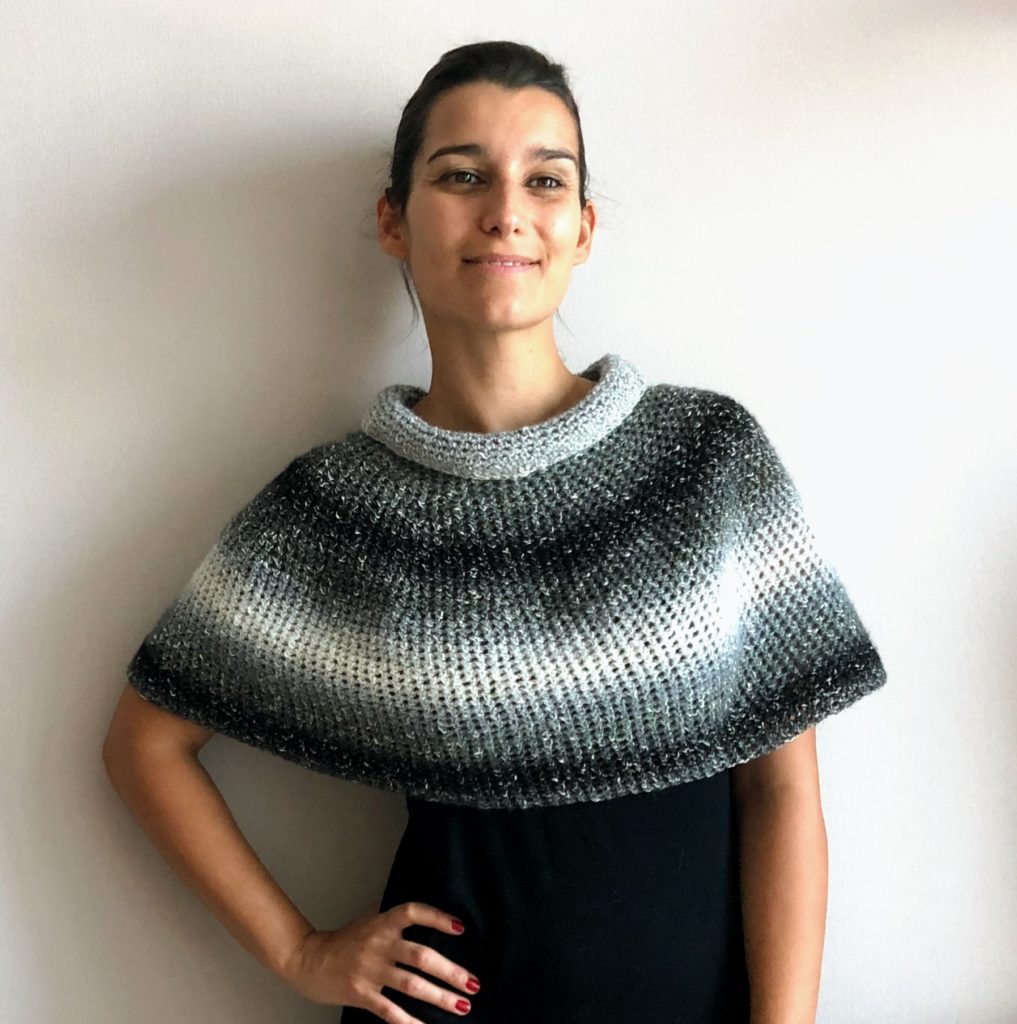
As for the shape, definitely a delicate silhouette. But let’s not forget the practical side, so the length of the capelet should hit just above the elbow. This ensures a complete range of movement.
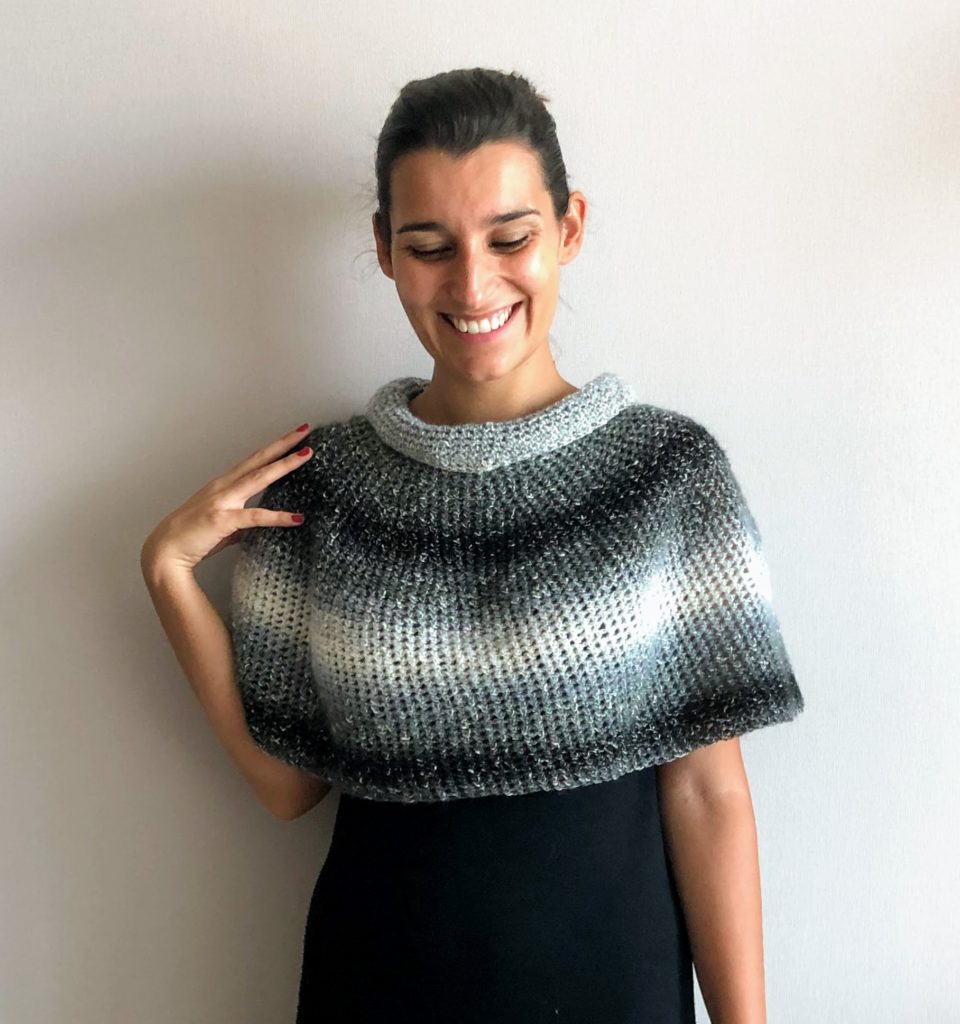
I added a little bit of a cowl neckline, for comfort and style. Personally, I like it rolled outside but it is loose enough for you to style as you please.
Lesson Learned
When this project started taking form in my mind, I was aiming for a practical layering piece, because I am a practical person (even if my husband might disagree). But this was taking the shape of a wearable that I honestly don’t wear. And that would be just useless.
So to me, the challenge was to get the right elements together to make a project that would be both functional and beautiful. And I was happily surprised with the result! I
My lesson here… put your personality in your pieces and you’ll always end up with something YOU will wear and be proud of! 😉 And there’s nothing more practical than that!
Pattern
- You can buy the ad-free, printable PDF pattern HERE!
- PIN this pattern for later HERE!
- Add this pattern to your Ravelry queue HERE!
Description
A show-stopper layering piece that will keep your shoulders warm and will never fall out of place! Worked bottom-up, this seamless capelet is done simply with continuous rounds of single crochet stitches.
Skill Level
- Easy
Have in Hand
- 1 (2, 2) skeins Lion Brand Shawl in a Ball (481yd/440m) in Feng Shui Grey
- US Size J/10 (6.0 mm) crochet hook
- Stitch markers
Gauge
- 12 sc x 16.5 rows = 4”/10 cm
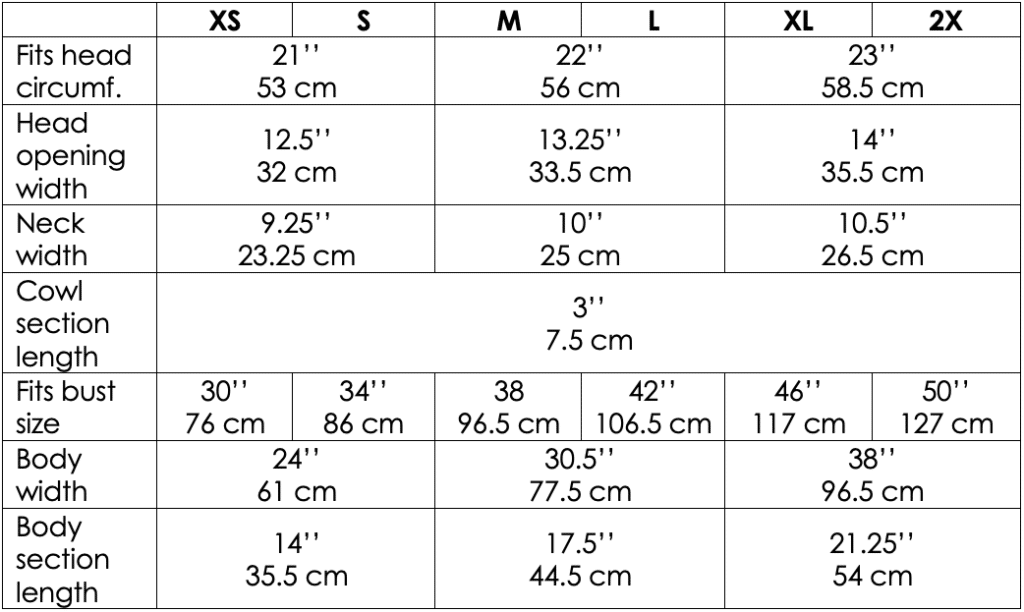
Finished Measures
- Written for sizes XS/S (M/L, XL/2X):

Abbreviations (US Terms)
- dec: decrease [work 2 single crochet together]
- inc: increase [work 2 single crochet in 1 stitch]
- sc: single crochet
- sl st: slip stitch
- st(s): stitch(es)
Special Stitches
fsc: foundation single crochet
- ch 2, insert hook in 2ndch from hook, yarn over and draw up a loop (1st ch made). Yarn over and draw through 1 loop on hook (2 loops on hook), yarn over and draw through both loops on hook (1st
fsc made). - * Insert hook in chain of previous foundation stitch, yarn over and draw up a loop (ch made). Yarn over and draw through 1 loop on hook (2 loops on hook), yarn over and draw through both loops on hook (2nd
fsc made). Repeat from * until number of fsc have been made.
Notes
- The project is worked top bottom. You will start with the head opening and decrease slightly until you reach the neck. Then you will work increases to ensure space for shoulders and bust. Once you reach the desired bust size you will keep the same st count until the end of the project.
- If you are not comfortable with the
fsc , you can do the first round by making the same number of chains and then working a round of sc. Careful because it won’t have as much stretch as thefsc , so consider using a larger hook size. - This project is worked in continuous rounds, meaning that you do not sl st when you reach the end of the round. Instead, you just keep working your sts above the ones from the previous round. I recommend using a stitch marker to mark the first st of every round so that you can keep count easily.
- In order to make the dec/inc less noticeable on the final shape of the
capelet I did them in different parts of the rounds. Sometimes at the beginning, others at the end and others in the middle. In the pattern below I always start with dec/inc, but it is just as a reference. What matters is that you keep the same number of sts between each dec/inc while in the same round. This tutorial on how to make the perfect crochet circle shows you how!
Crochet Silver Lining Capelet
Cowl Section
Fsc 76 (80, 84)
Don’t forget to mark either your first stitch or last so that you can keep count of rounds easily.
Round 1: 1 sc in each st around <76, (80, 84) >.
Round 2: Work 4 decreases in this round. Ex: [Dec, 17 sc] 4 times <72, (84, 40)>.
Round 3-10: Repeat Rounds 1 & 2, 4 more times, decreasing 4 sts in each even round. Round 10 will have total stitches <56, (60, 64)>.
Round 11 & 12: 1 sc in each st around <56, (60, 64)>.
Body Section
Round 13: Work 8 increases in this round. Ex: [Inc, 6 sc] 8 times <64 (68, 72)>.
Round 14: 1 sc in each st around <64, (68, 72)>.
Round 15 – 34 (44, 54): Repeat Rounds 13 & 14, increasing 8 sts in each uneven round. Round 34 (44, 42) will have total stitches <144, (188, 232)>.
At this point try on your capelet. It should cover your shoulders easily, about 1’’/2.5 cm below your armpit. It should be roomy enough for your bust and for you to open your arms. If needed, keep repeating rounds 13 and 14 until you reach correct room/length. Note this will add to yardage.
Round 35 (45, 55): 1 sc in each st around <144 (188, 232)>.
Repeat previous round 35 (39, 45) more times or until desired length. Sl st, fasten off and weave in ends.
Enjoy making your Crochet Silver Lining Capelet and let me know in the comments what you think! 🙂

3 Comments
Question: If this is worked in the round, when you you attach it to be worked in the round? It is never mentioned in the pattern. Also with the FSC, how do you join this together? It ends up taller than a regular sc to sl together to form a round.
Anyways thanks.
Hello Kim,
Thank you for your question. The project is worked in the round, but in a spiral, which means you never join, you just keep working. There are more details in the 3rd bullet of the Notes section.
For the FSC, the trick is the same. Because you are working in a spiral, when you make the sc, you will work on top of the FSC, so it won’t be noticeable the difference in heights. I also used the end from the slip knot from the first FSC to join to the base of the last FSC to make it even less noticeable.
Let me know if this helped! 🙂
All the best.
This pattern appears in the round-up Trendy Colorful Crochet Cowls by Pattern Center.