This post may contain affiliate links. I may receive a small commission at no extra cost to you that goes towards supporting Fluffy Stitches. All opinions are my own. Full Privacy & Disclosure Policies HERE.
Tunisian Raffia Tote
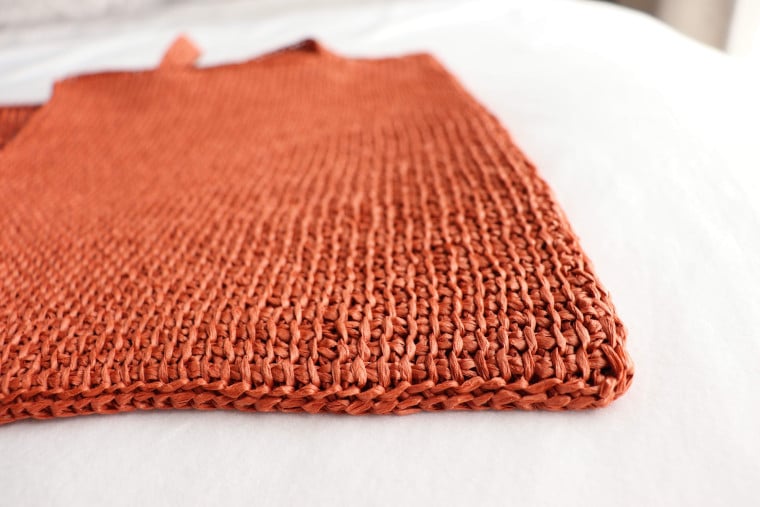
Summer is here and with it fresh summer projects, such as the Tunisian Raffia Tote! If you ever wanted to try Tunisian crochet I present you with one of the easiest projects to start with. And in the end, you’ll have made the coolest tote ever!
- Pin it for later!
- Keep scrolling for the free version of the Tunisian Raffia Tote!
- Get the inexpensive add-free PDF with all the details from your favorite store:
Inspiration
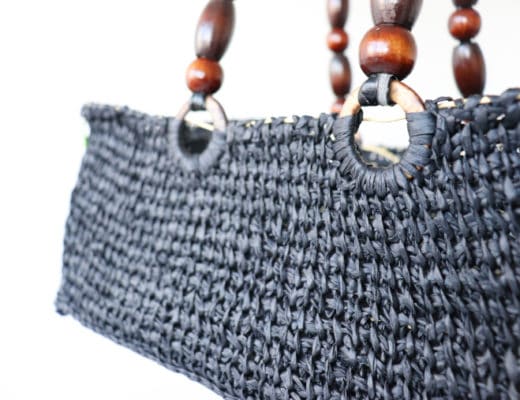
If there’s one material I love to work with during summertime it’s raffia. Case in point, my first project, the Granny Square Raffia Bag was also made with raffia! And when I saw the new colors for Wool And The Gang Ra-Ra Raffia I immediately wanted to make something with them.
But you know something else I love? A challenge! 🙂 And this summer, I set myself to learn more stitches and techniques. On top of my list is Tunisian Crochet!
So for this summer project, I had Ra-Ra Raffia , Tunisian Crochet and… Well, a girl can never have too many bags, right? 😉
The Project
Now… what do you do if you want to learn Tunisian Crochet? I don’t know about you, but I went to the queen herself! And to me, the queen of Tunisian Crochet is Toni from TL Yarn Crafts. Her tutorials are amazing and you just need one little tutorial to get you going!
With the little knowledge of Tunisian I had, one thing was certain: this had to be a crazy simple pattern. Which means no shaping, no crazy turns, just something flat and straightforward to make. Therefore, the simplest bag I could make was a tote. Looking at the fabric totes I had lying around and seeing how they are made, it sure is a pretty easy project.
How perfect is that? I could see it already on my shoulder, a
With all this in my mind, I grabbed a notebook and scribbled down all of these ideas. I watched Toni’s absolute guide for beginners and started crocheting away. And that’s all it took! A couple of days later, I had my
So if you are new to Tunisian Crochet, one thing I can assure you: YOU CAN MAKE THIS! And why am I qualified to say such a thing? Because this was MY FIRST Tunisian project. 🙂 So go ahead, get your Ra-Ra Raffia and let’s get to it!
Pattern
- Pin it for later!
- Keep scrolling for the free version of the Tunisian Raffia Tote!
- Get the inexpensive add-free PDF with all the details from your favorite store:
Description
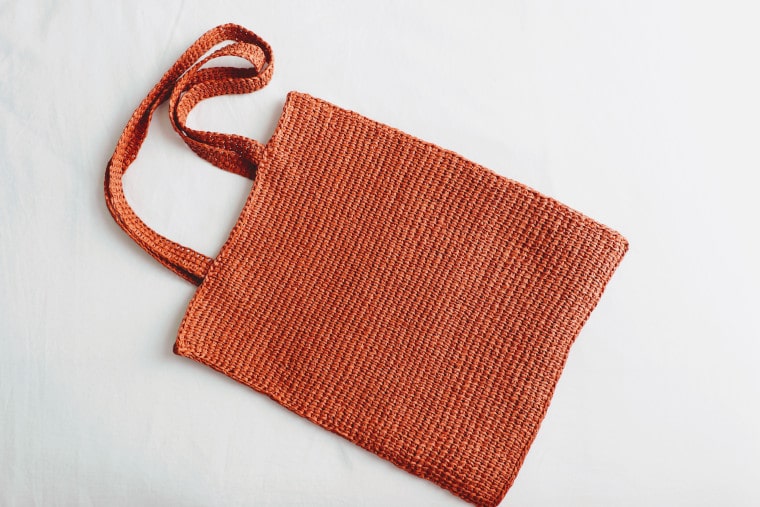
The Tunisian Raffia Tote is the accessory you were missing this summer! Dive into Tunisian crochet with this easy-breezy free pattern!
Skill Level
- Basic
Have in Hand
- 2 skeins Wool and the Gang Ra-Ra Raffia (273yd/250m) in Cinnamon Dust or approx. 413 yds/378 m of another sport-weight paper yarn
- US 8/H (5.0 mm) Tunisian crochet hook with at least 12’’ cord
- Stitch markers, measuring tape, tapestry needle, scissors, steam iron (regular clothes iron with steam setting)
Gauge
- 18 sts x 15 rows = 4”/10 cm
Finished Measures
- Panel: 12’’/30.5 cm wide x 15’’/38 cm tall
- Strap: 1’’/2.5 cm wide x 26’’/66 cm (1+’’/ 2.5 cm per end of strap to attach)
Abbreviations (US Terms)
- ch: chain
- rs: right side
- sl st: slip stitch
- st(s): stitch(es)
tss :tunisian simple stitch
Notes
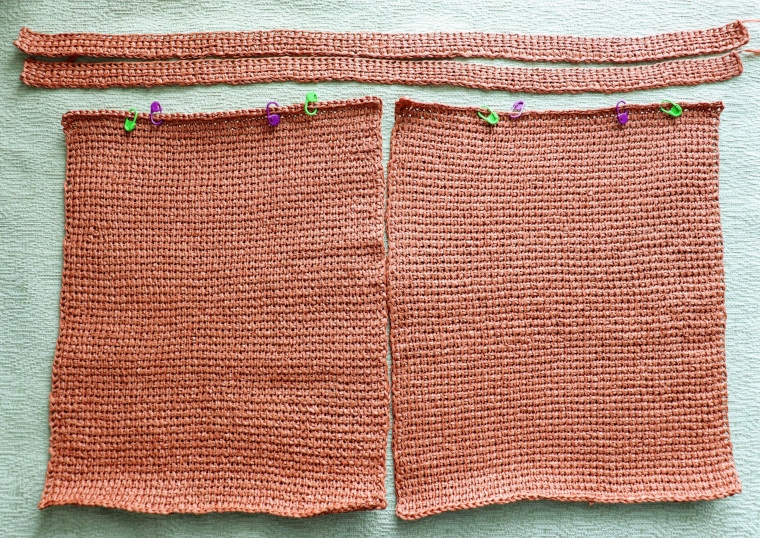
- Tote is worked as 2 rectangular panels and 2 straps separately. Each strap is sewn to a panel. The panels are sl st together.
- The loop on the hook counts as the first stitch.
- In the pattern below, all rows (including the foundation row) are followed by a return pass, which is not specified.
- To make the return pass: ch 1, * yarn over, pull through two loops on hook. Repeat from * until one loop left on hook and proceed to the instructions for next row.
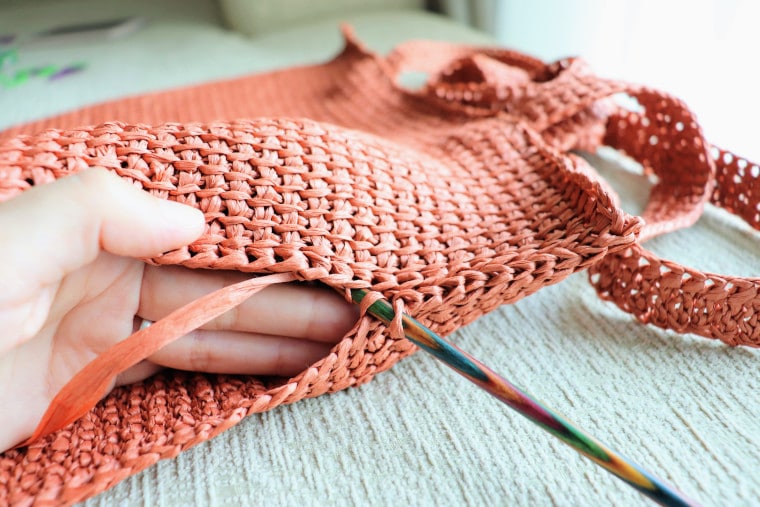
Tunisian Raffia Bag
Panel (make 2)
Foundation row: Ch 54. Turn your chain and pull up a loop in 2nd ch from hook and each ch across. <54>
Row 1- 56: tss across. <54>
Slip stitch bind off loosely. Fasten off and weave in end.
Strap (make 2)
Foundation row: Ch 4. Turn your chain and pull up a loop in 2nd ch from hook and each ch across. <4>
Row 1- 104: tss across. <4>
Slip stitch bind off. Fasten off and weave in end.
Assembly
Your panels and straps will curl, so give them a little steam to flatten them out before assembly. Attention as they may stretch a bit by doing this.
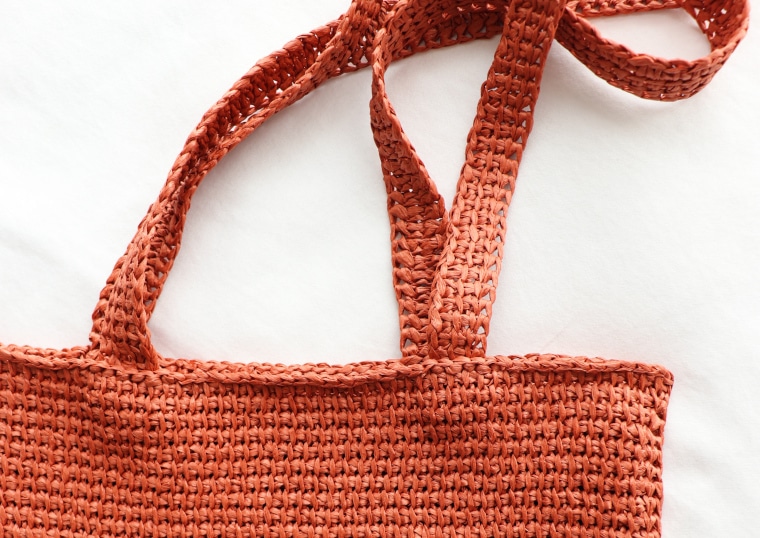
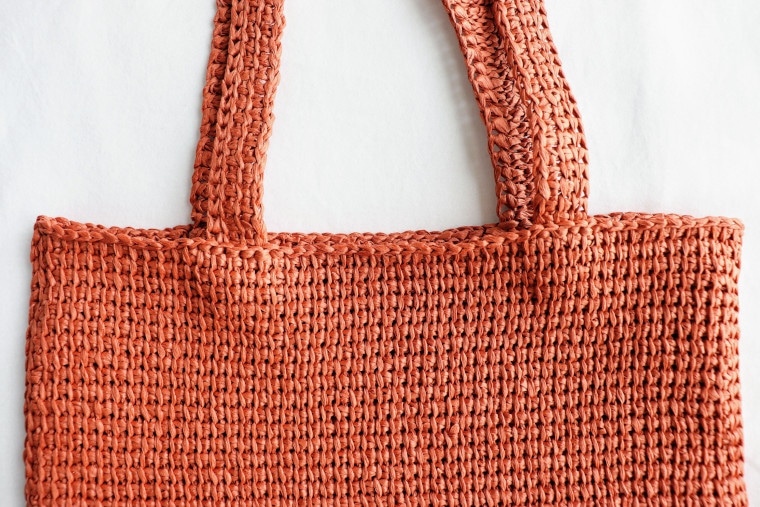
Attaching the straps
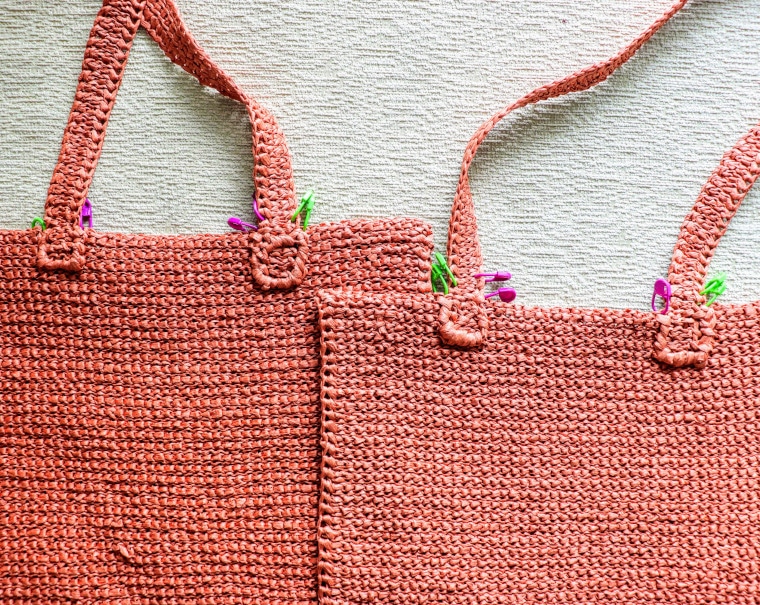
Sew each strap to a panel. The straps are approx. 3’’/7.5 cm from each side of the bag and approx. 4’’/10 cm apart. They are sewn to the panel leaving 1’’/2.5 cm of each side of the strap inside the bag.
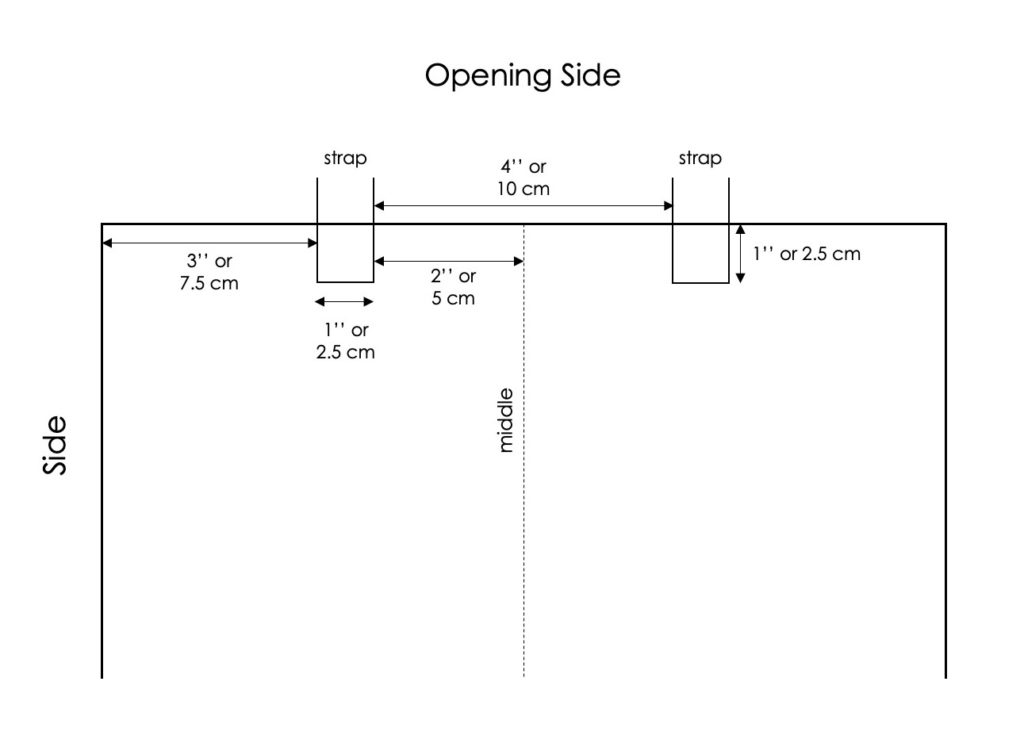
Mark each panel where the strap will go. Place a stitch marker on the stitches before and after where the strap will go. This
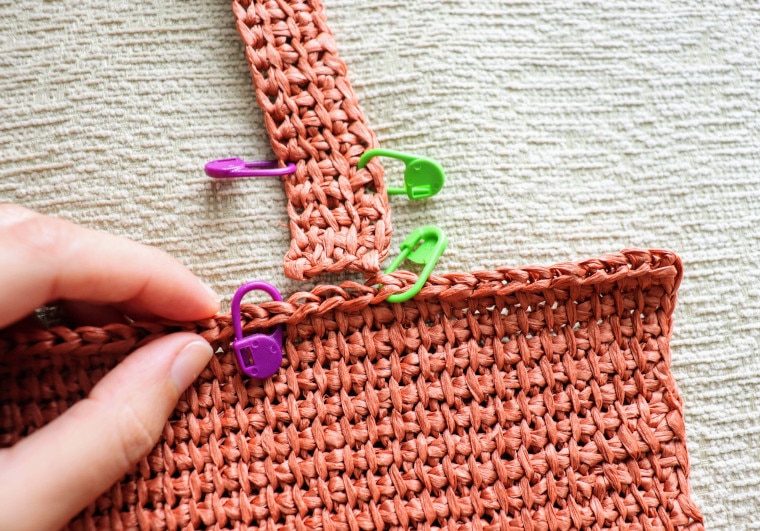
With the rs of the panel and strap facing you, align the stitch markers. Using a tapestry needle and a double strand of raffia, begin attaching the strap to the panel. Start from the first st of Row 4 of the strap to the panel by inserting the needle below the slip stitch bind off. Sew from one side to the other and then back again.
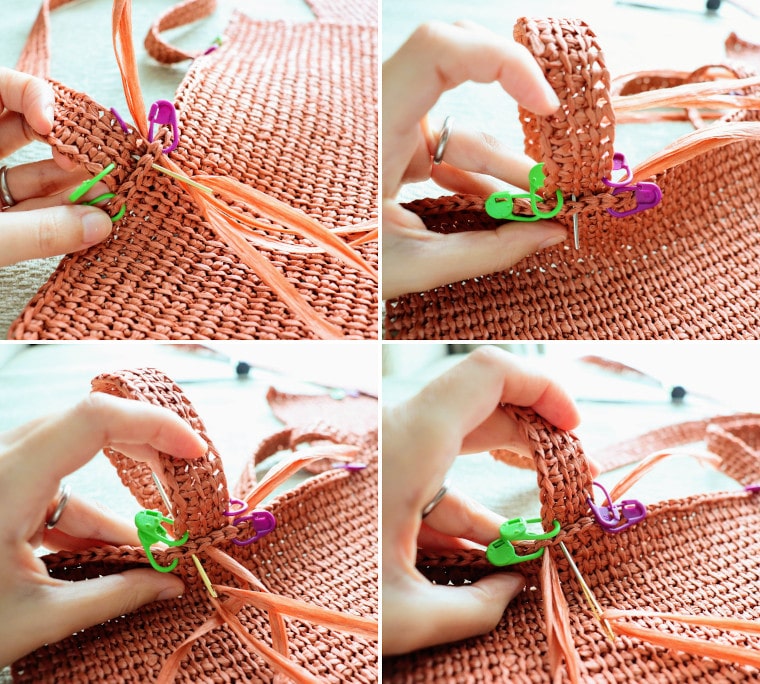
Turn the panel. Sew the end of the strap to the inside of the panel, making sure the stitches are not noticeable from the rs.
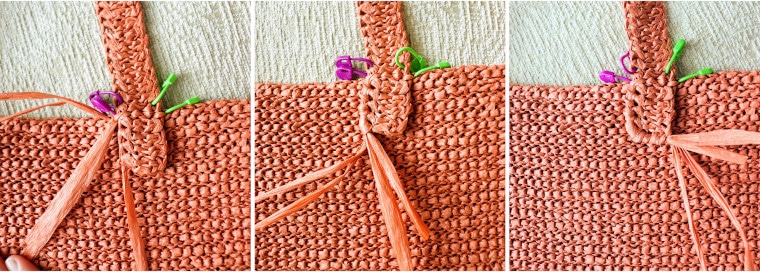
Do this for the other end of the strap. Repeat for the other strap.
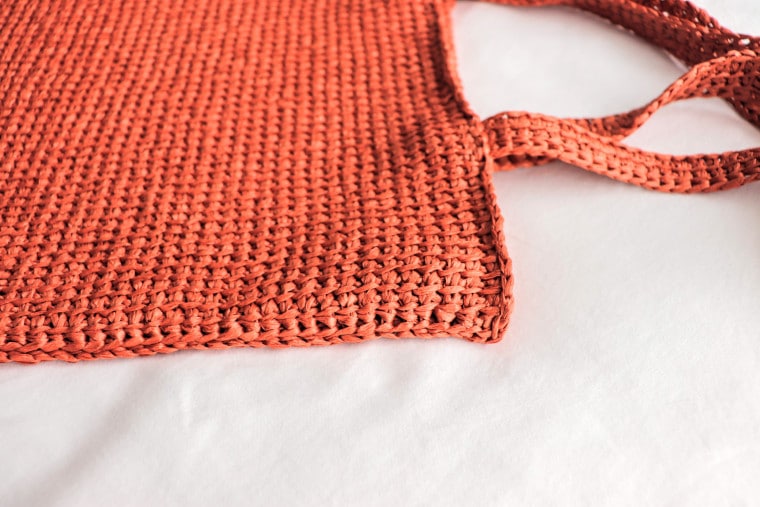
Closing the tote
With rs of the panels facing out and the opening of the bag on your right, align the panels. Place stitch markers on the panels to help guide you.
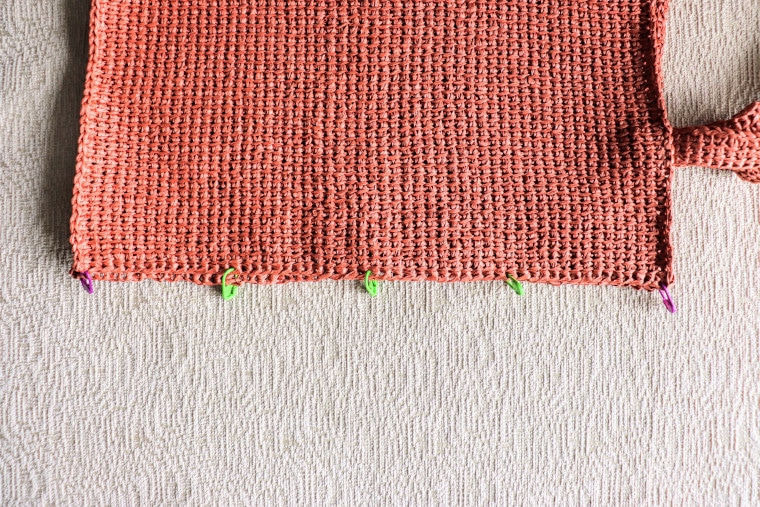
Starting from the first st of the side of the panel, sl st through the back loops of the edge sts at of the panel.
Keep sl st until you close 3 sides of the bag. Fasten off and weave in ends.

No Comments