
This post may contain affiliate links. I may receive a small commission at no extra cost to you that goes towards supporting Fluffy Stitches. All opinions are my own. Full Privacy & Disclosure Policies HERE.
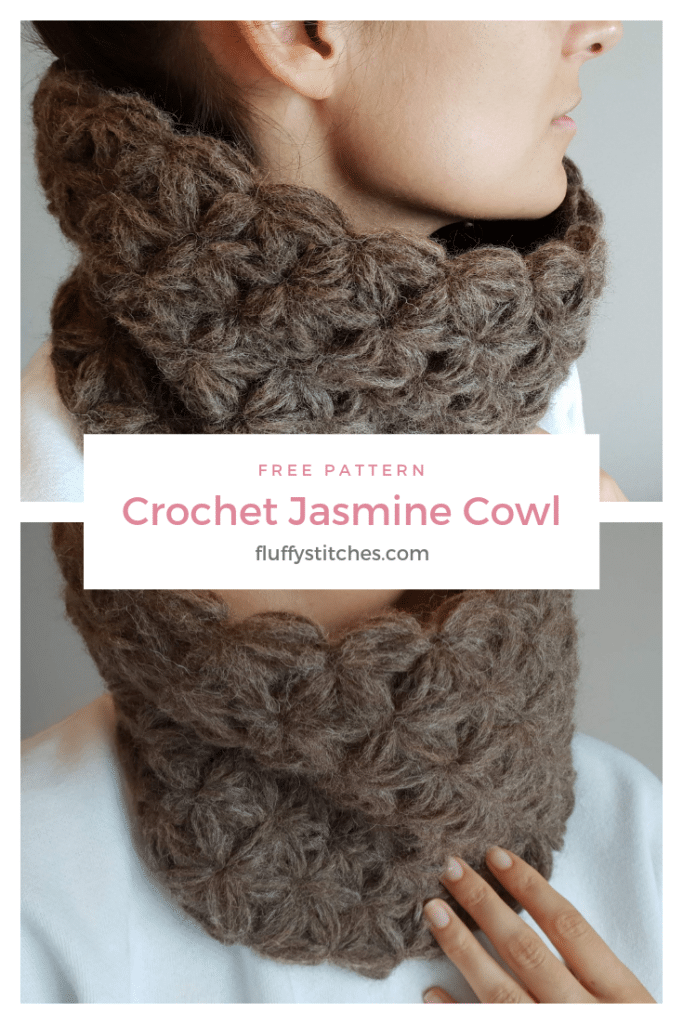
Crochet Jasmine Cowl
In December you start feeling the tick of the clock about having all your Christmas presents ready. If you’re anything like me you’re still missing a few ones. And that has got you looking around for a beautiful crochet pattern, for gifts that you can finish up in a couple of hours. Well, look no further, you just found the Crochet Jasmine Cowl!
Inspiration
Last year, when the crochet bug bit me, I decided that all my Christmas presents would be handmade by me. In order to accomplish this mission, I needed an easy crochet pattern. Knitting was not yet on the horizon. Also, I was looking for something “flashy” as I wanted to surprise everyone with my awesome skills. As a result, my efforts were rewarded, as this was definitely my most appreciated present and a lot of people asked me to do more to gift. And I have to admit it myself… I’m very happy with how the Crochet Jasmine Cowl turned out.
Project
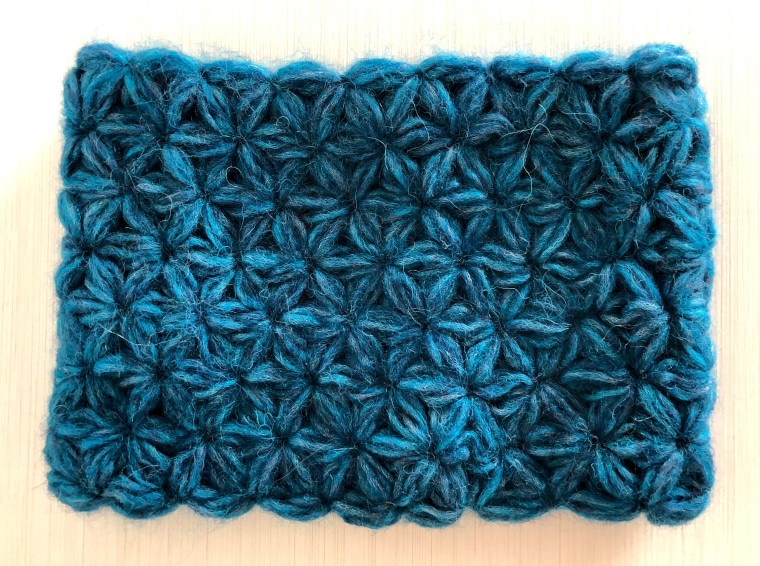
While looking around Pinterest like crazy I found this nice stitch called the jasmine stitch, which apparently is made out of puff stitches. Well, hello beauty!! 🙂
However
While finding the stitch is part of the challenge, you need to figure out what to do with it. I definitely wanted it to be a quick project, therefore, I opted for a cowl. Now, it all came down to materials. (And learning the stitch, but no biggie.)
Yarn
I will not bore you with how many skeins I had to go through. Completely lost count! The good thing was that it allowed me to practice so much that I had the stitch mastered before I had the yarn. 😀
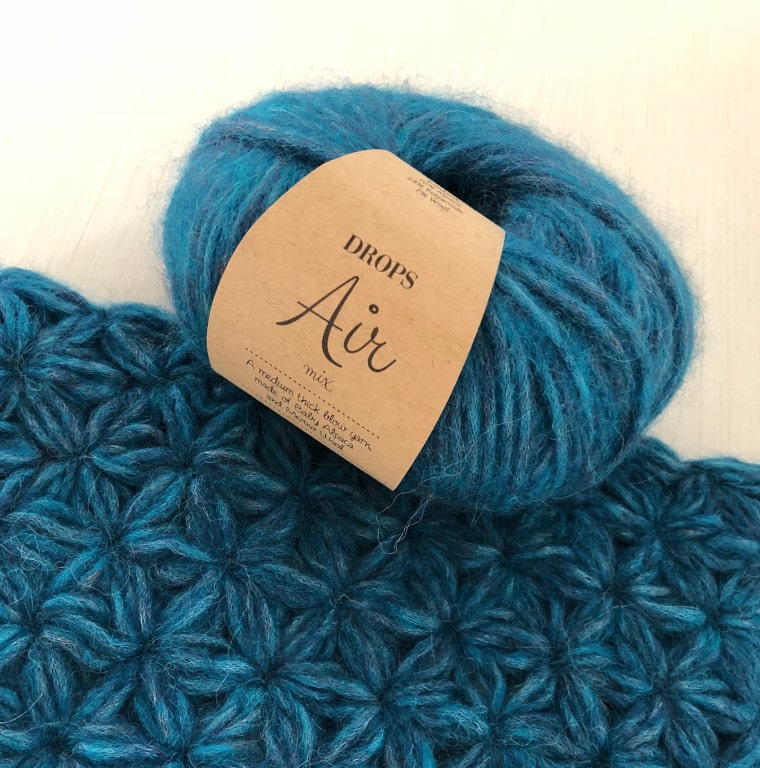
Finally, after a lot of trials and even more errors, my choice of yarn for this project was Drops Air. Not only it has this fluffy look about it, but it’s soft and warm. While it does have this fuzzy look, it doesn’t itch against the skin. And another great thing is that if your gauge is anything like mine, you have just found your “Cowl in a Ball” 😉 One skein, one cowl!
Jasmine Stitch
Going back a little to the stitch… It is not a typical crochet stitch and it may take you a little while to get the hang of it. However, once you do, you’ll pick up the pace like crazy. I’ve come to the point, where it takes me just 2 hours to complete a cowl. One of the reasons that makes it so quick is that it’s done in the round. You just keep going, no interruptions. And also… no seams!!!
Since the jasmine stitch is not your average crochet stitch I have written a series of posts to show you how I’ve mastered it! You can find all my secrets here! With these in hand, you have everything you need to make
Pattern
- You can buy the ad-free, printable PDF pattern HERE!
- PIN this pattern for later HERE!
- Add this pattern to your Ravelry queue HERE!
Description
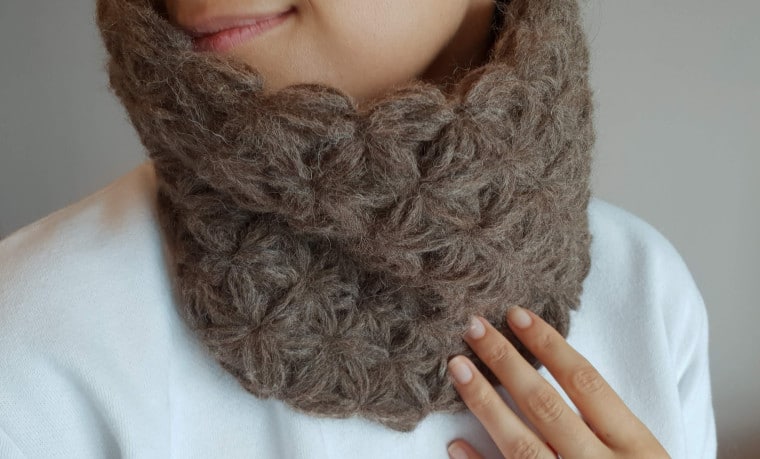
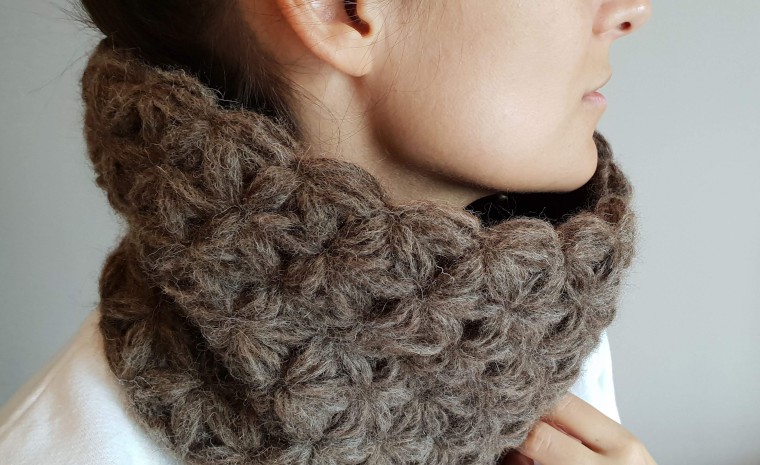
The Crochet Jasmine Cowl is a beautiful cowl made completely in jasmine stitch. A great design to turn to when you need to make a quick and
Skill Level
- Intermediate
Have in Hand
- 1 (2) skeins Drops Air (164 yd/150m) in Brown Mix 05
- US Size J (6.0mm) crochet hook
- tapestry needle
Gauge
- 4 puff sts x 5 rounds = 4”/10 cm
Finished Measures
- Written for sizes XS/S/M (L/XL/XXL):
| XS / S / M | L / XL / XXL | |
| Fits head circumf. | 21’’ 53 cm | 23’’ 58.5 cm |
| Cowl width | 8.5’’ 20.3 cm | 9.5’’ 24 cm |
| Cowl length | 5.6’’ 12.7 cm | 6.4’’ 16.25 cm |
Abbreviations (US Terms)
- ch: chain
- yo: yarn over
- st(s): stitch(es)
Special Stitches
Take a look at my Jasmine Stitch Series for tutorials on all the stitches mentioned below!
jp: joining puff
- puff stitch with one less loop than the pattern calls for.
ps: (5-loop) puff stitch
- Ch 1 and lengthen your loop (1 loop on hook). Pinching the ch st, yo (2 loops on hook). Try to keep the initial lengths for your loops. Insert hook into ch, pull up a loop and lengthen it (3 loops on hook). Yo (4 loops on hook). Insert hook into ch, pull up a loop and lengthen it (5 loops on hook).
- Yo once again and pinch the yarn that forms the back loop of your yo. Without letting go of the yarn, pull through all loops (1 loop on hook). Insert your hook under the yarn you are pinching and pull up a loop (2 loops on hook). Yo and pull through both loops to close the puff st. Ch 1 to tighten it.
fps: foundation puff stitch
- Complete one ps.
- * Lengthen your loop (1 loop on hook). Yo (2 loops on hook). Insert hook into st that holds the 5 loops of the previous stitch together. Pull up a loop and lengthen it (3 loops on hook). Yo (4 loops on hook). Insert hook into st, pull up a loop and lengthen it (5 loops on hook).
- Yo once again and pinch the yarn that forms the back loop of your yo. Without letting go of the yarn, pull through all loops (1 loop on hook). Insert your hook under the yarn you are pinching and pull up a loop (2 loops on hook). Yo and pull through both loops to close the st. Ch 1 to tighten it. Repeat from * until the
number of foundation puff stitches have been made.
3pc: 3-puff cluster
- Start as if making a ps, but stop once you have 5 loops on hook.
- Yo as if to pinch the yarn, but instead, insert the hook into the st between the last 2 puff sts (the puff that made your work “go up” and the last puff of the previous row/round) and pull up a loop.
- * Lengthen your loop. Yo and insert hook into same st as before and pull up a loop. Repeat from * until you have 10 loops on hook. Yo as if to pinch the yarn, but instead, insert the yarn into the st that connects the 3rd and 2nd completed puff st from hook.
- ** Lengthen your loop. Yo and insert hook into same st as before and pull up a loop. Repeat from ** until you have 15 loops on hook. Now, yo and pinch the back loop from the yo.
- Holding the yarn pull through all loops (1 loop on hook). Insert your hook under the yarn you are pinching and pull up a loop (2 loops on hook). Yo and pull through both loops to close the cluster. Ch 1 to tighten it.
join in the round
- Start making the 3pc, by making the first 2 ps (10 loops on your hook).
- Yo and – ensure your clusters are not twisted – insert your hook both through the next st of the foundation sts and the st that connects the joining puff with the foundation sts. Yo and lengthen your loop. The last loop you have on your hook will now make part of the joining puff, making it finally a 5-loop puff st. You are now ready to close the cluster.
- Insert your hook (11 loops on hook) into the st that closed your joining puff. Yo and pinch the back loop of the yo. Holding the yarn, pull through all loops on hook (1 loop on hook). Insert your hook through the st that holds the joining puff together and under the yarn you are still pinching. Yo and pull up a loop (2 loops on hook). Yo and pull through both loops to close the st. Ch 1 to tighten it.
Notes
- The project is worked in seamless rounds.
- You can alter the measurements of the cowl. By making more puff stitches in the foundation you will make it wider and by adding more rounds you will make it lengthier.
Crochet Jasmine Cowl
Fps 18 (20)
Round 1: Make a jp. Work 18 (20) 3pc on your fps. Join in the round. <18 (20)>
Round 2: Make a jp. Continue working 3pc and join in the round. <18 (20)>
Rounds 3 – 7 (8): Repeat Round 2. <18 (20)>
Weave in ends.
1 Comment
This pattern appears in the round-up DIY Favorites – Cowls by Spinster Simone